Like Michelangelo planning the Sistine Chapel, you’re about to design a kitchen that works as beautifully as it looks. I’ve found that most people waste steps and counter space simply because they haven’t thought through their layout strategically.
Here’s the thing: small changes, like positioning your dishwasher within 36 inches of your sink or spacing pendant lights 24 to 36 inches apart, create significant differences in how you’ll actually cook and live. But there’s a smarter way to figure this out before you commit to anything.
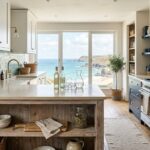
Start With Your Kitchen Layout Style

Why does your kitchen layout matter so much? I’ll tell you: it’s the foundation of everything! Your kitchen layout styles determine how you cook, move, and enjoy your space.
Let me break down your main options. Galley kitchens work great in narrow spaces with parallel cabinets. L-shaped layouts fit corners nicely and create natural traffic flow. U-shaped designs give you tons of storage across three walls, perfect if you’ve got room.
Peninsula kitchens add an island for extra counter space and casual dining. Single-wall setups are compact and budget-friendly, ideal for smaller homes.
I recommend thinking about your space first. Is it long and narrow? Corner-heavy? Wide open? Your answer points you toward your best layout style. The right choice makes cooking feel effortless!
Apply the Work Triangle to Plan Your Cook, Prep, and Cleanup Zones

I’m going to show you how the work triangle makes your kitchen more efficient. This simple concept connects your three main zones: cooking, prep work, and cleanup. You won’t be running between your stove, counter, and sink constantly.
Let me explain how defining and optimizing these zones helps your kitchen work better for you.
Defining Your Work Triangle
The work triangle functions best when I keep its perimeter under 26 feet total. Shorter distances mean I’m not exhausted running between stations.
A well-defined work triangle eliminates wasted steps and frustration. It’s like having an invisible roadmap through my kitchen.
Optimizing Zone Placement Strategy
How you arrange your cooking, prepping, and cleanup zones is important in a functional kitchen! I’ve learned that your kitchen layout directly impacts how smoothly you work. Here’s what I do to optimize my zones:
- Keep my work triangle perimeter under 26 feet for efficient movement
- Leave 12 inches of counter space on cooktop sides for safety
- Position my range hood 32 inches above the cooktop
- Place my dishwasher within 36 inches of the sink
I’ve discovered that thoughtful zone placement reduces my steps and stress. You’ll notice cooking becomes easier when appliances work together logically.
My cleanup flows naturally when the sink, dishwasher, and storage connect. This strategic arrangement changes how you experience daily kitchen tasks, making you feel right at home in your space.
Plan Cabinet and Countertop Heights for Comfort
Ever notice how some kitchens just feel easier to work in?
That’s often about countertop height! I’ve learned that setting your countertop height at 36 inches from the floor makes cooking and prep work comfortable for most people. It’s the sweet spot that reduces strain on your back and arms.
Now, don’t forget about the space above your counters. I always aim for at least 15 inches between upper cabinets and countertops; 18 inches is even better if you’ve got room. This gives you breathing space and makes everything feel less cramped.
For seating areas, I plan 12 to 18 inches of overhang, depending on your stool height. These details matter! Getting heights right changes how your kitchen actually feels to use daily.
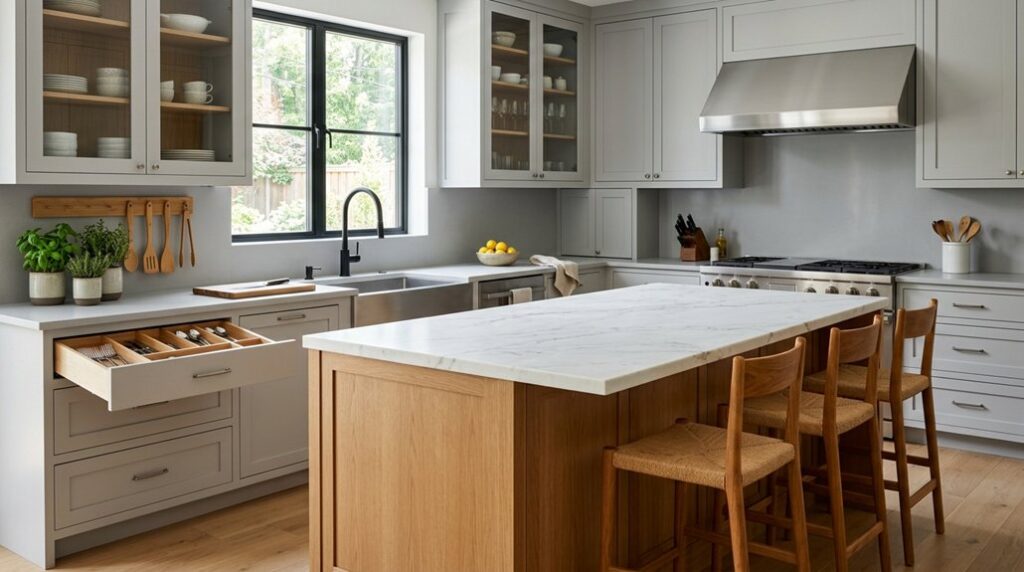
Design Island Seating and Clearance Zones
I’ll walk you through the seating specifics that make your island actually usable, because nothing’s worse than cramped legs or guests bumping into each other while you’re cooking. You’ll want to nail three key details: the overhang depth so people sit comfortably, the walking space behind them, and how you space those pendant lights overhead.
Let me break down exactly how to measure and plan each one so your island becomes the gathering spot everyone appreciates.
Overhang and Seating Comfort
When you’re planning island seating, the details matter! I’ve learned that getting these right creates a kitchen that feels spacious and comfortable. Let me share what actually works:
- Allow 12–18 inches of overhang for your counter
- Space stools so legs fit under with 10 inches clearance
- Leave 18 inches behind seated guests for movement
- Keep 45–60 inches of walking space around the island
You’re creating gathering spots where family and friends feel welcome. That overhang isn’t just a number; it’s the difference between guests feeling squeezed and genuinely comfortable.
When someone sits at your island, they’ll appreciate legroom that doesn’t feel cramped. These measurements matter more than you’d think!
Clearance Behind Seated Guests
Have you thought about what happens behind someone sitting at your island? I’ve learned that this space matters just as much as the seating itself. You’ll want 45–60 inches of walking clearance behind seated guests. This gap lets people move freely to walls or dining tables without bumping into anyone’s back.
Think of it as creating natural traffic flow in your kitchen layout. When you’re planning your island, measure from the back of your stools to whatever’s behind them. This distance keeps your space functional and welcoming. Nobody enjoys feeling cramped or trapped while eating.
Pendant Lighting Spacing Guidelines
Where do your pendant lights go above the island? I’ll help you nail this! Getting your pendants right improves your kitchen’s overall appearance.
Here’s what I’ve learned works best:
- Space pendants 24–36 inches apart for balanced light coverage
- Inset edge lights from your island’s ends to avoid awkward gaps
- Hang pendants 30–40 inches above the countertop for perfect brightness
- Plan 12–18 inches of overhang so guests sit comfortably underneath
The key is dividing your island length by the number of lights you want. This simple math prevents uneven spacing that throws off your kitchen’s look. I started doing this calculation first, then adjusted from the ends inward.
Your pendants become functional art that actually works for your space!
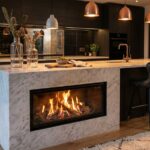
Balance Task, Ambient, and Accent Lighting Layers

How’s your kitchen lighting right now? Is it bright enough to chop vegetables safely, but also warm enough to relax in?
You need multiple lighting layers working together. I’d recommend starting with task lighting for bright, even illumination over countertops and islands. This keeps you safe while cooking. Next, add ambient lighting: those dimmer, warmer fixtures that create a cozy atmosphere for family gatherings.
Finally, consider accent lighting to highlight backsplashes or open shelving. Think of it like layering clothes, where each piece serves a purpose, but together they create something wonderful.
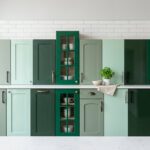
Select Finishes and Materials for Your Style and Budget

When you’re picking finishes and materials, you’ll want to think about what’ll actually hold up in your kitchen and what makes you happy every time you walk in. I find that balancing durability with colors and textures that match your style, such as choosing granite or quartz counters that resist scratches, creates a kitchen you’ll love for years.
The 3D view lets you test different combinations, so you can see how a white subway tile backsplash pairs with warm wood cabinetry before you commit to anything!
Material Quality And Durability
Since you’re investing time and money into your kitchen, you’ll want materials that look great and actually last. Durability is important for the difference between a kitchen that works well and one that disappoints.
Here’s what I focus on:
- Cabinet finishes that resist moisture and scratches from daily use
- Countertops like quartz or granite that handle heat and spills without damage
- Flooring options such as ceramic tile or luxury vinyl that withstand foot traffic
- Backsplash materials that won’t stain or crack over time
The kitchen planner helps me evaluate how different materials perform together. I consider my cleaning routine and family habits. Quality materials might cost more upfront, but they save money long-term. I’m building a space that works for my real life, not just looks pretty in photos.
Color Palette And Design Coordination
Now that you’ve picked materials that’ll actually hold up, it’s time to make them look great together. I love exploring the Create-A-Kitchen design library because it shows how colors interact. You can test backsplash tiles against countertops. See wall colors next to cabinet finishes. The 3D viewing modes let me visualize everything from different angles before committing.
Here’s what makes design coordination easier: our free designer assistance. They’ll help you align finishes with your personal style without charging a dime. Want your cooktop area to flow seamlessly? They’ve got you covered. Whether you’re mixing warm wood tones with cool marble or bold colors with neutral bases, exploring extensive color options helps everything feel planned and coordinated throughout your space.
Optimize Appliance Placement and Spacing

Getting your appliances in the right spots completely changes how your kitchen works! I’ve learned that smart kitchen layout planning makes cooking easier and faster. Here’s what I do:
- Keep your work triangle (sink, cooktop, refrigerator) under 26 feet total
- Space your cooktop 12 inches from counters on each side for safety
- Position your dishwasher within 36 inches of the sink to save steps
- Mount range hoods 26–36 inches above cooktops for proper ventilation
When you nail these spacing rules, you’ll feel the difference immediately. Your workflow becomes smoother. You’re not twisting around appliances or reaching awkwardly.
That’s when cooking becomes enjoyable instead of frustrating. I’ve watched kitchens work better with just improved appliance placement.
Test Your Design in the Free Planner

Have you ever wished you could see your kitchen layout before actually building it? I can finally test my designs risk-free using the free planner. Here’s what makes it great:
| Feature | What You Get |
|---|---|
| Layout Options | Kitchenette, L-kitchen, U-kitchen, G-kitchen |
| Door & Window Placement | Full control over entrances and traffic flow |
| 3D Viewing | Bird’s-eye view plus manual camera positioning |
| Design Cost | Completely free floor plan exploration |
You’ll visualize how different configurations fit your actual space. I position doors and windows exactly where I need them, then rotate my view to check everything from every angle.
No downloads required. No charges ever. When I’m ready, I contact a designer or request a quote directly in the planner. This approach turns planning from stressful guessing into confident decision-making.
Reference Real Customer Designs for Inspiration

Once you’ve tested your layout in the free planner, you’re ready to see what’s actually possible. Real customer designs show you genuine kitchens that changed real spaces. I love browsing these projects because they spark kitchen design inspiration I wouldn’t find elsewhere.
Here’s what makes customer galleries so valuable:
- See actual layouts before and after installation
- Discover finish combinations that work together beautifully
- Learn how precise planning improved traffic flow and usability
- Find solutions for your specific space challenges
These authentic examples prove virtual planning actually works. You’ll notice how the design team’s guidance helped customers make confident decisions.
When you see a kitchen you love, you’re not just dreaming. You’re seeing proof it’s achievable. That’s the sense of belonging every kitchen planner needs.
Book Your Free Design Consultation
Why wait to redesign your kitchen when expert help is just a phone call away? I’ve discovered that booking a free design consultation through the Kitchen Planner makes a real difference. You’ll get personalized guidance without spending a dime or downloading anything complicated.
Designers help you plan your ideal layout, whether that’s a kitchenette, L-kitchen, U-kitchen, or G-kitchen. They’ll position doors and windows exactly where you want them. You’ll see 3D views and birds-eye perspectives before committing to anything.
The best part? You’re not alone in this. Our design team really cares about creating a kitchen that matches your style and needs. Call 877-573-0088 or email [email protected] to start planning today. Your dream kitchen is waiting.