Non-dairy coffee creamers are a delightful way to enhance your morning brew without sacrificing taste or health.
These homemade recipes offer a creamy texture with a hint of flavor, making your coffee experience both satisfying and guilt-free.
I first stumbled upon these delicious alternatives when I decided to cut down on dairy products, and I was amazed by the variety and richness they can provide.
Whether you’re vegan, lactose-intolerant, or simply looking for a healthier option, these non-dairy creamers will elevate your coffee to a whole new level.
The History and Cultural Significance
• Non Dairy Coffee Creamer Recipes Healthy And Delicious traces its origins to the rise of plant-based diets in the late 20th century, where alternatives to dairy began to gain popularity.
• The dish evolved over decades as nutritionists and chefs explored various plant-based ingredients, eventually becoming the diverse array of flavors we enjoy today.
• In many cultures, especially among vegan communities, these creamers symbolize a shift towards healthier living and sustainability, reflecting a growing awareness of dietary choices.
• While many variations exist across different regions, the authentic versions maintain the creamy texture and rich flavors that set them apart from commercial creamers.


Recipe Overview
Nutritional Information (per serving)


Ingredients


Essential Equipment Guide
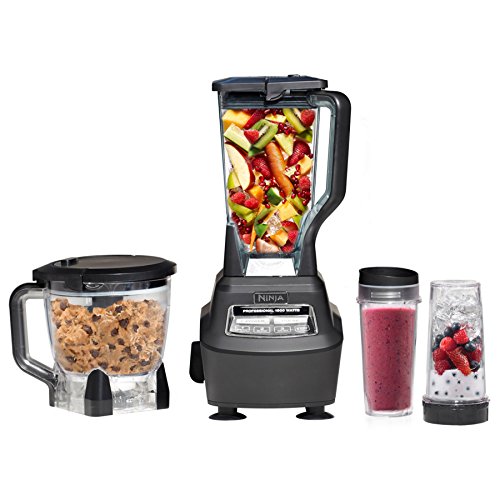
High-Speed Blender: This tool is crucial for achieving a smooth and creamy texture when combining ingredients. Look for models with at least 1000 watts of power to blend ingredients thoroughly and quickly.
Measuring Cups and Spoons: Accurate measurements are key to replicating flavors and textures. Invest in a set of nested measuring cups and spoons to ensure precision when adding ingredients.
Glass Jars: These are perfect for storing your homemade creamers. Choose jars that are airtight to maintain freshness and prevent spoilage.


Preparation Methods
Blending: This technique is essential for emulsifying the oils and liquids in your creamer. Blend on high until the mixture is completely smooth and well combined, which usually takes about 1-2 minutes.
Infusing: To enhance flavors, allow your creamers to infuse for a few hours or overnight in the refrigerator. This lets the flavors meld together, producing a richer taste.
Storing: Proper storage is crucial to maintain freshness. Use airtight containers and store your creamers in the refrigerator for up to a week.
Step 1: Gather Ingredients

Start by collecting all the ingredients needed for your non-dairy coffee creamer.
Ensure you have everything measured out and ready to go to streamline the process.
This preparation helps in maintaining a smooth workflow while blending.
Check for any specific dietary needs if you’re preparing for others.
Step 2: Combine Base Ingredients

In a high-speed blender, pour in the almond milk and coconut milk.
These bases provide the creamy texture that will make your coffee enjoyable.
Blend them together on high until smooth and well mixed.
This step is crucial for creating a uniform consistency without any lumps.
Step 3: Add Flavorings

Next, add the maple syrup, vanilla extract, and cinnamon to the blender.
These ingredients will enhance the taste of your creamer, making it rich and flavorful.
Blend on medium speed until fully incorporated.
Taste the mixture and adjust sweetness as needed.
Step 4: Optional Add-ins

If you want to create a flavored variation, add cocoa powder or nutmeg at this stage.
These add-ins provide unique twists to the traditional recipe.
Blend again until everything is well mixed and smooth.
This is the moment to get creative with your flavors.
Step 5: Taste and Adjust

Stop the blender and taste your creamer.
Feel free to add more sweetener or spices to suit your preferences.
Blend again briefly to combine any additional ingredients.
This step ensures that your creamer is personalized just for you.
Step 6: Store the Creamer

Carefully pour the creamer into glass jars for storage.
It’s important to use airtight containers to keep the flavor fresh.
Label the jars with the date to track freshness.
Store in the refrigerator for up to a week.
Step 7: Serve with Coffee

When ready to enjoy, simply shake the jar to mix any settled ingredients.
Pour the desired amount into your cup of coffee and stir gently.
This creamer blends beautifully, enhancing your coffee experience.
Enjoy the rich flavors and creamy texture that you created yourself.
Step 8: Experiment with Flavors

Feel free to try different flavor combinations with your creamers.
Ingredients like pumpkin spice or flavored extracts can add seasonal flair.
Keep notes of your variations to recreate your favorites.
This makes each cup of coffee exciting and new.
Critical Timing and Temperature Guide
Blending: Blend for at least 1-2 minutes for a smooth texture. Look for a creamy consistency without lumps; common mistakes include under-blending, which results in a gritty texture.
Infusing: Allow the creamer to sit in the refrigerator for at least 1 hour. This helps the flavors develop; avoid serving immediately, as the taste will improve with time.
Storing: Keep in the refrigerator and consume within 7 days. Always check for any off smells or changes in texture before use.
Pro Tips for Non Dairy Coffee Creamer Recipes Healthy And Delicious
• Ingredient Selection: Use high-quality almond and coconut milks for a creamier texture and better flavor.
• Preparation Secret: Let the mixture chill for a few hours before using to enhance the flavor.
• Temperature Management: Ensure your ingredients are at room temperature for better blending.
• Texture Enhancement: For an ultra-smooth texture, blend in small batches if necessary.
• Flavor Layering: Consider adding a pinch of sea salt to bring out the sweetness of your creamer.
• Make-Ahead Strategies: Prepare a larger batch and store it in the fridge for quick access.
• Restaurant-Quality Finishing Touches: Top your coffee with a sprinkle of cocoa powder or cinnamon for an appealing finish.
• Equipment Optimization: A high-speed blender is worth the investment for achieving the perfect consistency.
Troubleshooting Common Issues
• Texture Too Thin: This can happen if too much liquid is used. To fix it, consider adding more coconut milk or a thickening agent like chia seeds.
• Flavors Unbalanced: If your creamer tastes flat, try adding a pinch of salt or an extra splash of vanilla to enhance the flavor.
• Separation: If the creamer separates in storage, give it a good shake before use. If it’s a recurring issue, try blending it again to emulsify.
• Not Sweet Enough: Adjust sweetness by adding additional maple syrup or another sweetener to reach your taste preference.
• Too Sweet: To counteract excessive sweetness, add a bit more almond or coconut milk to dilute the flavor.
Variations and Regional Differences
• Vanilla Almond Creamer: Use vanilla almond milk instead of regular almond milk for an enhanced vanilla flavor, perfect for a creamy base.
• Spiced Pumpkin Creamer: Incorporate pumpkin puree and pumpkin spice for a seasonal treat that adds warmth and coziness.
• Chocolate Hazelnut Creamer: Blend in hazelnut milk and cocoa powder for a rich, nutty twist reminiscent of a popular spread.
• Modern Interpretations: Experiment with oat milk or cashew milk for unique textures and flavors, catering to current dairy-free trends.


Food Science Behind the Recipe
• Emulsification: This is the process that allows water and fat to mix smoothly, which is essential for creating a creamy texture in your creamer. Understanding this helps in choosing the right ingredients for stability.
• Flavor Extraction: Infusing your creamers allows flavors to meld together, enhancing depth and complexity. Knowing how flavors interact can lead to better recipes.
• Temperature Control: Keeping ingredients at room temperature aids in blending and prevents separation, ensuring your final product is smooth and well-mixed.
Frequently Asked Questions
What’s the most common mistake people make when preparing non-dairy coffee creamers? A common mistake is not blending sufficiently, leading to a gritty texture. Ensure you blend until completely smooth.
Can I prepare components of this dish in advance? Yes, you can prepare the creamer ahead of time and store it for up to a week in the refrigerator.
How do I adapt this recipe for dietary restrictions? You can substitute the almond and coconut milk with oat milk or soy milk to accommodate nut allergies.
What’s the best way to store and reheat leftovers? Store in an airtight container in the fridge. There’s no need to reheat, simply shake to mix before using.
Can I freeze this dish? Freezing is not recommended as it may alter the texture. Instead, store it in the fridge for freshness.
What wine or beverages pair best with this dish? For a delightful pairing, enjoy with a light dessert wine or herbal tea.
How can I scale this recipe up for a crowd? Simply multiply the ingredients by the number of servings you need, ensuring to use a larger blender or make in batches.
What side dishes complement this recipe best? Breakfast pastries or muffins pair wonderfully with coffee and creamer.
How do professional chefs elevate this dish for restaurant service? They often use house-made syrups and unique flavor combinations to create signature coffee experiences.
Serving and Presentation Guide
• Traditional Presentation: Serve your coffee in a clear glass mug to showcase the creamy texture of the non-dairy creamer swirling into the coffee.
• Modern Plating Ideas: Use elegant coffee cups with a side of fresh whipped coconut cream for an appealing presentation.
• Accompaniment Suggestions: Pair with a chocolate croissant or biscotti for a delightful coffee experience.
• Special Occasion Presentation: For festive gatherings, garnish with a sprinkle of cocoa or cinnamon and serve with decorative stirrers.
Conclusion
I hope you enjoy making your own non-dairy coffee creamers at home.
With endless flavor possibilities, you can customize each batch to suit your taste preferences.
These healthy alternatives not only benefit your diet but also elevate your daily coffee ritual.