This delightful coffee cake recipe with buttermilk brings a perfect balance of tenderness and moisture that promises to satisfy any sweet craving.
The rich flavor profile combines buttery notes with a hint of tanginess from the buttermilk, creating a cake that’s both comforting and indulgent.
I first encountered this recipe during a cozy brunch gathering, where its irresistible aroma filled the air and instantly made it a crowd favorite.
Whether you’re enjoying a quiet morning at home or entertaining guests, this coffee cake is sure to impress with its simple preparation and delightful taste.
The History and Cultural Significance
• Coffee Cake Recipes With Buttermilk Tender And Moist traces its origins to the late 19th century in the United States, where it was originally created as a simple treat to accompany coffee.
• The dish evolved over the decades as baking techniques improved and new ingredients became available, eventually becoming the beloved version we know today.
• In American culture, this dish traditionally appears at brunches, family gatherings, and holiday celebrations, symbolizing warmth and togetherness.
• While many variations exist across different regions, the authentic version maintains its signature moistness and tender crumb, setting it apart from imitations.
Recipe Overview
Nutritional Information (per serving)
Ingredients
Essential Equipment Guide
Mixing Bowl: A good quality mixing bowl is essential for combining ingredients evenly. Look for a bowl that is large enough to hold all your batter without spilling, preferably made of glass or stainless steel for durability.
Hand Mixer or Stand Mixer: Using a mixer ensures that your batter is mixed thoroughly, leading to a consistent texture. A stand mixer is ideal for larger batches, while a hand mixer is a great space-saving alternative.
9×13-inch Baking Pan: This size is perfect for creating an even coffee cake that bakes through without burning. Choose a non-stick or glass pan to ensure easy release after baking.
Preparation Methods
Layering the Ingredients: This technique involves carefully adding ingredients in specific order to ensure even distribution of flavors. Start with creaming the butter and sugar, then add eggs and buttermilk, which helps create a smooth batter. Mastering this step is crucial for achieving a tender crumb.
Making the Streusel Topping: Combine cold butter with flour and sugar using your fingers or a pastry cutter to create a crumbly texture. The key is to work quickly to keep the butter cold, which leads to a light and flaky topping. Aim for pea-sized clumps for the best texture.
Testing for Doneness: Insert a toothpick into the center of the cake to check if it comes out clean, indicating that the cake is fully baked. Be cautious not to overbake, as this can result in a dry texture. The cake should spring back slightly when touched.
Step 1: Preheat the Oven

Start by preheating your oven to 350°F (175°C).
This temperature is crucial for ensuring even baking throughout the cake.
Make sure to allow enough time for the oven to reach the desired temperature before placing the cake inside.
Using an oven thermometer can help confirm that your oven is accurate and ready to go.
Step 2: Prepare the Baking Pan

Grease a 9×13-inch baking pan with butter or non-stick spray.
This step prevents the cake from sticking to the pan after baking.
Make sure to cover all corners and edges thoroughly for easy release.
You can also line the bottom with parchment paper for added assurance.
Step 3: Mix the Dry Ingredients

In a large mixing bowl, combine the flour, baking powder, baking soda, salt, and cinnamon.
Whisk these ingredients together until they are evenly mixed, ensuring no lumps remain.
This step is crucial for even distribution of leavening agents throughout the batter.
Set this bowl aside while you prepare the wet ingredients.
Step 4: Cream Butter and Sugar

In another bowl, cream together the softened butter and sugar using a hand or stand mixer.
Beat until light and fluffy, which usually takes about 2-3 minutes.
This process introduces air into the mixture, contributing to the cake’s light texture.
Scrape down the sides of the bowl occasionally to ensure even mixing.
Step 5: Add Eggs and Buttermilk

Add the eggs one at a time to the creamed mixture, beating well after each addition.
Then, mix in the buttermilk until fully incorporated.
This step helps to create a moist batter, thanks to the acidity of the buttermilk.
Be careful not to overmix, as this can lead to a dense cake.
Step 6: Combine Wet and Dry Ingredients

Gradually add the dry mixture to the wet mixture, stirring gently until just combined.
Be cautious not to overmix, as this can affect the texture of the cake.
You want to see a few streaks of flour remaining for a tender crumb.
Fold in any additional mix-ins like nuts or chocolate chips at this point, if desired.
Step 7: Prepare the Streusel Topping

In a separate bowl, combine brown sugar, flour, and cold butter to make the streusel topping.
Use your fingers or a pastry cutter to mix until crumbly, with pea-sized clumps forming.
This topping will provide a delightful crunch and sweetness to the cake.
Set the streusel aside while you pour the batter into the prepared pan.
Step 8: Pour Batter into the Pan

Pour the prepared batter into the greased baking pan, spreading it evenly across the surface.
Use a spatula to smooth the top, ensuring an even layer for baking.
This step is vital for achieving uniform cooking throughout the cake.
Tap the pan gently on the counter to release any air bubbles.
Step 9: Add Streusel Topping

Sprinkle the prepared streusel topping evenly over the batter in the pan.
Make sure to cover the entire surface for balanced flavor and texture.
This layer will caramelize slightly while baking, creating a delicious crust.
Use your fingers to ensure the streusel clumps remain intact for added crunch.
Step 10: Bake the Cake

Place the baking pan in the preheated oven and bake for 30-35 minutes.
Check for doneness by inserting a toothpick in the center; it should come out clean or with a few crumbs attached.
The cake should be golden brown and slightly springy to the touch when done.
Avoid opening the oven door too early, as this can cause the cake to sink.
Step 11: Cool and Serve

Once baked, remove the cake from the oven and let it cool in the pan for about 10 minutes.
Then, transfer it to a wire rack to cool completely before slicing.
This cooling period helps the cake set and improves its texture.
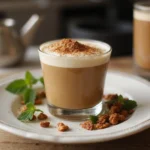
Serve warm or at room temperature with coffee or tea for the best experience.
Critical Timing and Temperature Guide
Baking Time: Bake the coffee cake for 30-35 minutes, checking for doneness with a toothpick. The cake is ready when it springs back to the touch and a toothpick comes out clean. Avoid opening the oven too early to prevent collapsing.
Cooling Time: Allow the cake to cool in the pan for 10 minutes before transferring it to a wire rack. This helps maintain its structure and prevents it from becoming soggy. If left too long in the pan, moisture can accumulate.
Storage Temperature: Store the cooled cake at room temperature if consuming within a few days. For longer storage, refrigerate or freeze, ensuring it’s wrapped tightly to prevent drying out.
Pro Tips for Coffee Cake Recipes With Buttermilk Tender And Moist
• Ingredient Selection: Use fresh buttermilk for the best flavor and moisture.
• Preparation Secret: Let your ingredients come to room temperature before mixing; it creates a smoother batter.
• Temperature Management: Preheat your oven and ensure it’s at the right temperature before baking for even results.
• Texture Enhancement: Avoid overmixing; stop once the flour is incorporated for a tender crumb.
• Flavor Layering: Consider adding vanilla extract or citrus zest for depth of flavor.
• Make-Ahead Strategies: You can prepare the streusel topping in advance and store it in the fridge.
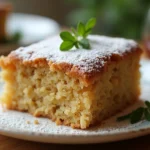
• Restaurant-Quality Finishing Touches: Dust with powdered sugar or drizzle with a simple glaze before serving.
• Equipment Optimization: Use a light-colored baking pan to prevent over-browning.
Troubleshooting Common Issues
• Texture Too Dense: This can happen if you overmix the batter. If you notice a dense texture, stop mixing as soon as the flour is incorporated in future attempts.
• Flavors Unbalanced: If the cake is too sweet or lacks flavor, adjust the sugar or add a pinch of salt. Taste the batter before baking to ensure it’s balanced.
• Crust Overbrowning: If the top browns too quickly, tent the cake with aluminum foil halfway through baking to prevent burning.
• Uneven Baking: Ensure the oven racks are positioned in the center of the oven for optimal heat circulation. Rotate the pan halfway through baking for even results.
• Streusel Topping Sinks: If the streusel sinks into the batter, make sure the batter is thick enough before adding the topping. A thicker batter will hold the topping better.
Variations and Regional Differences
• New England Coffee Cake: This version often includes a layer of cinnamon sugar filling in the middle, enhancing the flavor with a sweet surprise.
• German Streuselkuchen: A richer coffee cake that uses cream in the batter and features a thick layer of streusel on top, making it more decadent.
• Fruit-Infused Coffee Cake: Adding fruits like blueberries or apples provides a fresh twist and keeps the cake moist.
• Modern Interpretations: Incorporating gluten-free flour or plant-based substitutes for butter and eggs caters to dietary restrictions while maintaining the cake’s essence.
Food Science Behind the Recipe
• Leavening Agents: The combination of baking powder and baking soda reacts with the acidity in buttermilk, producing carbon dioxide that helps the cake rise and become fluffy.
• Emulsification: Creaming the butter and sugar creates an emulsion that traps air, which contributes to a light texture.
• Moisture Retention: Buttermilk not only adds flavor but also helps retain moisture in the cake, resulting in a tender crumb and preventing dryness.
Frequently Asked Questions
What’s the most common mistake people make when preparing coffee cake? Overmixing the batter is often the top mistake, leading to a dense texture. Mix just until combined for best results.
Can I prepare components of this dish in advance? Yes, you can make the streusel topping and dry ingredient mixture ahead of time. Store them in the refrigerator for up to 2 days.
How do I adapt this recipe for dietary restrictions? Substitute gluten-free flour for all-purpose flour and use dairy-free butter and milk for a vegan option.
What’s the best way to store and reheat leftovers? Store in an airtight container at room temperature for up to 3 days. Reheat in the microwave for 10-15 seconds before serving.
Can I freeze this dish? Yes, freeze the cooled cake wrapped in plastic wrap and foil for up to 2 months. Thaw in the refrigerator overnight before serving.
What wine or beverages pair best with this dish? A light-bodied coffee or a sweet dessert wine complements the flavors of the cake beautifully.
How can I scale this recipe up for a crowd? Simply double the ingredients and bake in a larger pan, adjusting cooking time as needed for thickness.
What side dishes complement this recipe best? Fresh fruit salad or a light yogurt parfait pairs nicely with the sweetness of the cake.
How do professional chefs elevate this dish for restaurant service? They might add a flavored glaze or serve with whipped cream and fresh berries for an elegant presentation.
Serving and Presentation Guide
• Traditional Presentation: Serve the coffee cake sliced on a rustic wooden board, dusted with powdered sugar for a classic touch.
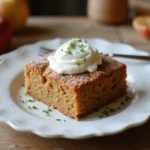
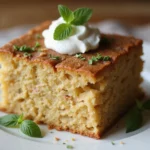
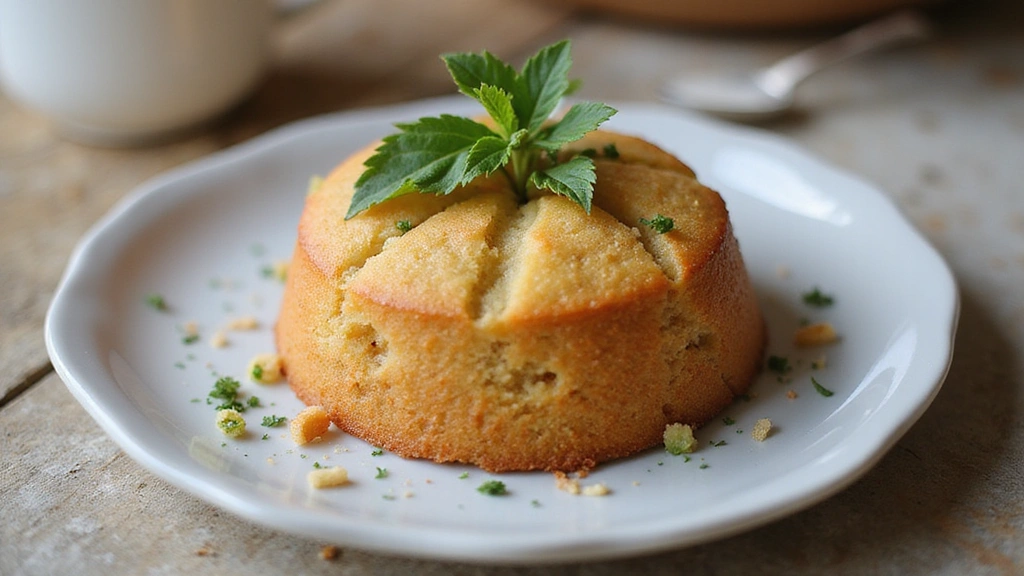
• Modern Plating Ideas: Present individual slices on white plates, garnished with fresh berries and a sprig of mint for a contemporary look.
• Accompaniment Suggestions: Pair with a dollop of whipped cream or a scoop of vanilla ice cream for indulgence.
• Special Occasion Presentation: Create a layered dessert by serving the cake with layers of cream and fruit, arranged in a clear glass to showcase its beauty.
Conclusion
I hope you enjoy making this coffee cake with buttermilk as much as I do.
Its tender and moist texture is truly a delight that will have everyone coming back for seconds.
Don’t hesitate to personalize it with your favorite flavors or toppings.
Happy baking!