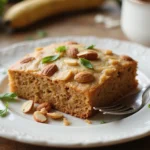
This Easy Bisquick Coffee Cake is a delightful treat that perfectly balances sweetness with the warmth of spices.
Its tender crumb and rich flavor make it an irresistible choice for breakfast or dessert.
I first stumbled upon this recipe while searching for quick ways to satisfy my family’s sweet tooth on busy mornings.
Whether you enjoy it fresh out of the oven or at room temperature, this coffee cake is sure to become a favorite in your home.
The History and Cultural Significance
• Bisquick Coffee Cake recipes trace their origins to the mid-20th century, coinciding with the rise of convenience cooking in American kitchens.
• The dish evolved as home bakers began to experiment with ready-mix products, leading to a variety of flavor combinations and styles.
• In many American households, coffee cake is a staple at brunch gatherings and holiday celebrations, symbolizing warmth and hospitality.
• While many variations exist, the authentic version often includes a crumbly topping and is served alongside coffee, creating a comforting morning ritual.
Recipe Overview
Nutritional Information (per serving)
Ingredients
Essential Equipment Guide
Mixing Bowl: A sturdy mixing bowl is essential for combining the ingredients thoroughly. Look for a large size to accommodate all elements and ensure even mixing, as this will affect the texture of the cake.
Measuring Cups and Spoons: Accurate measurements are key in baking. Use a set of dry measuring cups for solids and liquid measuring cups for liquids to ensure precision in your ingredients.
Baking Pan: A 9-inch round cake pan or a square pan works best for this recipe. Choose a non-stick option or line with parchment paper for easy removal of the cake after baking.
Preparation Methods
Mixing Dry Ingredients: Begin by whisking the Bisquick mix, sugar, and cinnamon together in a bowl. This ensures even distribution of the ingredients, allowing for a consistent flavor throughout the cake. Be sure to break up any lumps for a smooth batter.
Creaming Butter and Sugar: If using butter in the topping, cream it with brown sugar until light and fluffy. This technique incorporates air into the mixture, creating a lighter topping that contrasts beautifully with the dense cake.
Layering Technique: When assembling the cake, pour half the batter into the pan, sprinkle half the topping, and repeat with the remaining batter and topping. This creates a delightful marbling effect that enhances both the flavor and presentation.
Step 1: Preheat the Oven

Start by preheating your oven to 375°F (190°C).
This allows the cake to bake evenly from the moment it is placed inside.
Make sure to give the oven enough time to reach the desired temperature before putting in the cake.
A properly preheated oven is essential for achieving the perfect rise and texture.
Step 2: Prepare the Baking Pan

Grease your 9-inch round or square baking pan with butter or non-stick spray.
You can also line the bottom with parchment paper for easier removal.
Ensure all sides are coated to prevent the cake from sticking.
This step is crucial for preserving the cake’s shape and texture when serving.
Step 3: Mix the Dry Ingredients

In a large mixing bowl, whisk together the Bisquick mix, sugar, and cinnamon.
Ensure that the ingredients are fully combined without any lumps.
This step lays the foundation for the cake’s flavor and texture.
Using a whisk helps to aerate the mixture, leading to a lighter cake.
Step 4: Add Wet Ingredients

Add the milk, eggs, and vanilla extract to the dry ingredients.
Mix until just combined; over-mixing can lead to a dense cake.
The batter should be smooth, with a few lumps remaining.
This is a critical step to ensure the cake rises properly during baking.
Step 5: Prepare the Topping

In a separate bowl, combine brown sugar, cinnamon, and softened butter for the topping.
Use a fork or pastry cutter to mix until crumbly.
This topping will add a sweet and crunchy element to the cake.
Make sure it resembles coarse crumbs for the best texture.
Step 6: Layer the Batter and Topping

Pour half of the batter into the prepared baking pan and smooth it out evenly.
Sprinkle half of the topping over the batter, distributing it evenly.
Repeat with the remaining batter and topping for a marbled effect.
This technique creates a delicious contrast between the soft cake and crunchy topping.
Step 7: Bake the Cake

Place the pan in the preheated oven and bake for 25-30 minutes.
The cake is done when a toothpick inserted in the center comes out clean.
Keep an eye on it in the last few minutes to avoid over-baking.
A golden brown top with a slightly springy texture indicates perfect doneness.
Step 8: Cool and Serve

Once baked, remove the cake from the oven and let it cool in the pan for about 10 minutes.
Gently run a knife around the edges before turning it out onto a wire rack.
Allow it to cool completely before slicing to ensure clean edges.
This cooling step is important for the cake to set properly before serving.
Critical Timing and Temperature Guide
Baking Time: Bake the coffee cake for 25-30 minutes at 375°F. Look for a golden-brown top and a toothpick inserted in the center should come out clean.
Cooling Time: Allow the cake to cool for at least 10 minutes in the pan before transferring to a wire rack. This helps the cake set without breaking apart.
Serving Temperature: Serve the cake warm or at room temperature. A warm cake enhances its flavors and makes for a comforting treat.
Pro Tips for Bisquick Coffee Cake Recipes Quick And Delicious
• Ingredient Selection: Using fresh eggs and high-quality vanilla extract can greatly enhance the flavor of your coffee cake.
• Preparation Secret: Letting the butter come to room temperature before using it in the topping ensures a better texture and easier mixing.
• Temperature Management: Ensure your ingredients, especially eggs and milk, are at room temperature to help the batter mix more evenly.
• Texture Enhancement: For a lighter cake, avoid over-mixing the batter; it should be just combined.
• Flavor Layering: Add a dash of nutmeg to the batter for an extra layer of flavor that complements the cinnamon.
• Make-Ahead Strategies: You can prepare the batter and topping in advance and store them in the refrigerator until ready to bake.
• Restaurant-Quality Finishing Touches: Drizzle a simple glaze made of powdered sugar and milk over the cooled cake for a professional touch.
• Equipment Optimization: Using a stand mixer can save time and energy, making it easy to achieve the right consistency.
Troubleshooting Common Issues
• Dense Texture: This can occur from over-mixing the batter or using cold ingredients. To prevent this, mix until just combined and ensure ingredients are at room temperature.
• Dry Cake: If the cake turns out dry, it likely overbaked. Keep an eye on the baking time and use a toothpick to check for doneness early.
• Sticking to the Pan: If the cake sticks, ensure you grease the pan adequately and consider using parchment paper for easier release.
• Flavorless Cake: A lack of flavor may stem from not using enough vanilla or cinnamon. Always measure your spices and extracts accurately.
• Uneven Baking: If the cake bakes unevenly, ensure your oven is properly calibrated and rotate the pan halfway through baking.
Variations and Regional Differences
• New England Style: This version often includes apples or cranberries, adding a fruity twist to the classic recipe. The addition of nuts also enhances the texture.
• Southern Style: In the South, pecans and a drizzle of caramel sauce are common additions, making for a richer flavor profile.
• Modern Interpretations: Incorporating gluten-free Bisquick or using almond milk for a dairy-free option keeps the coffee cake accessible for dietary restrictions while maintaining its deliciousness.
Food Science Behind the Recipe
• Leavening Agents: The Bisquick baking mix contains leavening agents that help the cake rise. Understanding how these agents work is crucial for achieving the right texture.
• Emulsification: The eggs in the batter help emulsify the mixture, ensuring that the fat and liquid combine properly for a uniform texture.
• Caramelization: The sugars in the topping caramelize during baking, creating a crunchy, sweet layer that contrasts with the soft cake beneath.
Frequently Asked Questions
What’s the most common mistake people make when preparing Bisquick Coffee Cake? Over-mixing the batter is a common pitfall that leads to a dense and tough cake. Mix just until combined for the best results.
Can I prepare components of this dish in advance? Yes, both the batter and topping can be prepared ahead of time. Store the batter in the fridge for up to 24 hours before baking.
How do I adapt this recipe for dietary restrictions? To make it gluten-free, use a gluten-free Bisquick mix. For a dairy-free version, substitute milk with almond or soy milk.
What’s the best way to store and reheat leftovers? Store leftover cake in an airtight container at room temperature for up to 3 days. To reheat, place slices in the microwave for 10-15 seconds until warm.
Can I freeze this dish? Yes, the cake can be frozen for up to 3 months. Wrap it tightly in plastic wrap and foil, then thaw it in the refrigerator overnight before serving.
What wine or beverages pair best with this dish? A light-bodied coffee or a fruity white wine like Moscato pairs beautifully with the sweetness of the cake.
How can I scale this recipe up for a crowd? Simply double the ingredients and use a larger baking pan, adjusting the baking time as needed based on the increased volume.
What side dishes complement this recipe best? Fresh fruit or a light yogurt parfait makes for a delightful pairing with the coffee cake.
How do professional chefs elevate this dish for restaurant service? Chefs often serve this cake with a side of whipped cream or a scoop of ice cream, adding a gourmet touch.
Serving and Presentation Guide
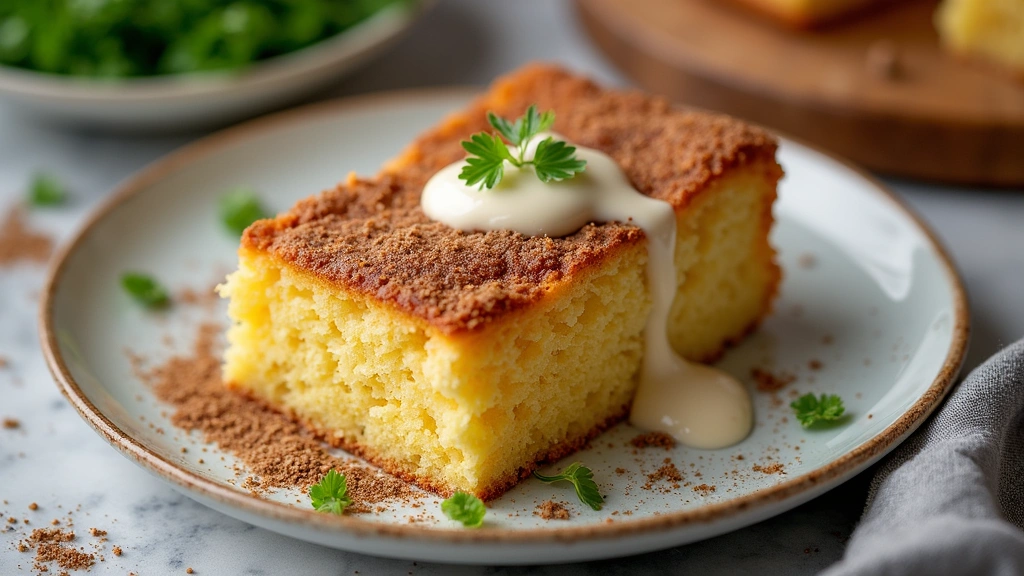
• Traditional Presentation: Serve the coffee cake on a rustic wooden cutting board, dusted with powdered sugar and garnished with fresh berries for color.
• Modern Plating Ideas: Slice the cake into neat squares and arrange them on a white plate with a drizzle of caramel or chocolate sauce.
• Accompaniment Suggestions: Pair with a dollop of whipped cream or a scoop of vanilla ice cream for a delightful dessert experience.
• Special Occasion Presentation: For celebrations, consider serving the cake on a tiered stand, adorned with edible flowers for an elegant touch.
Conclusion
I hope this Easy Bisquick Coffee Cake recipe brings as much joy to your kitchen as it has to mine.
It’s a simple yet delicious treat that’s perfect for any occasion.
Give it a try, and enjoy the delightful flavors and aromas filling your home.