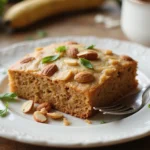
Apple Pie Coffee Cake combines the best of two beloved desserts into one delightful treat.
The warm spices of cinnamon and nutmeg mingle beautifully with sweet, tart apples, creating a comforting aroma that fills the kitchen.
I first encountered this recipe at a cozy café during a fall visit, where I was enchanted by the inviting flavors of autumn.
Perfect for breakfast, brunch, or as a sweet afternoon snack, this cake is sure to impress family and friends alike.
The History and Cultural Significance
• Apple Pie Coffee Cake Recipes Sweet Spiced Dessert Idea traces its origins to early American baking traditions, where home bakers sought to combine the flavors of pie and cake into one dish.
• The dish evolved over decades as coffee houses gained popularity in the 19th century, leading to the incorporation of coffee cakes into social gatherings.
• In the United States, this dish traditionally appears at family gatherings, holiday celebrations, and coffee brunches, symbolizing warmth and hospitality.
• While many variations exist across different regions, the authentic version maintains a moist crumb and a rich apple filling that sets it apart from imitations.
Recipe Overview
Nutritional Information (per serving)
Ingredients
Essential Equipment Guide
Mixing Bowl: A sturdy mixing bowl is essential for properly combining the ingredients. Look for a bowl that is large enough to hold all components without spilling, preferably made from glass or stainless steel for easy mixing.
9-inch Springform Pan: This pan allows for easy removal of the cake without damaging it. Opt for a non-stick variety to ensure the cake releases smoothly and check for a tight seal to prevent any leaks during baking.
Stand Mixer: A stand mixer is helpful for achieving a fluffy batter and well-mixed ingredients. While a hand mixer can work, a stand mixer allows for more consistent mixing and frees up your hands for other prep work.
Preparation Methods
Preparing Apples: Begin by peeling, coring, and dicing the apples uniformly. This ensures they cook evenly and integrate well into the cake. Toss the apple pieces with lemon juice to prevent browning and enhance their flavor.
Making the Topping: Combine oats, brown sugar, melted butter, and walnuts if using in a bowl. Mix until crumbly, ensuring the butter is evenly distributed for a crunchy texture. This topping adds a delightful contrast to the soft cake beneath it.
Creaming Butter and Sugar: In a mixing bowl, beat the softened butter and sugar together until light and fluffy. This process incorporates air, leading to a lighter cake texture. Scrape down the sides of the bowl to ensure all ingredients are well combined.
Step 1: Prepare Ingredients

Gather all ingredients and measure them accurately.
Ensure that your butter is softened for easy mixing.
Preheat your oven to 350°F (175°C) to ensure it’s ready for baking.
Prepare your mixing bowls and pans for a smooth cooking process.
Step 2: Prepare Apples

Peel, core, and dice the apples into uniform pieces.
Toss the apples in a little lemon juice to prevent browning and enhance their flavor.
Set aside the prepared apples while you work on the cake batter.
This step ensures the apples are ready to integrate into the batter easily.
Step 3: Cream Butter and Sugar

In a mixing bowl, beat the softened butter and granulated sugar together until light and fluffy.
This process should take about 3-5 minutes with a stand mixer on medium speed.
Scrape down the sides of the bowl to ensure all the butter is well mixed.
This helps incorporate air, resulting in a lighter cake texture.
Step 4: Add Eggs and Sour Cream

Add the eggs, one at a time, mixing well after each addition.
Then, blend in the sour cream until fully incorporated.
The sour cream adds moisture and a slight tang, enhancing the cake’s richness.
Ensure there are no lumps for a smooth batter.
Step 5: Mix Dry Ingredients

In a separate bowl, whisk together the flour, baking powder, baking soda, salt, and spices.
Ensure there are no lumps in the dry mixture for even distribution.
This step prepares the leavening agents to react properly in the baking process.
Gradually add the dry ingredients to the wet mixture, alternating with the milk.
Step 6: Combine the Batter

Mix the wet and dry ingredients together until just combined.
Be careful not to overmix, as this can lead to a dense cake.
Fold in the prepared apples gently, ensuring they are evenly distributed throughout the batter.
This step is crucial for maintaining a light texture.
Step 7: Prepare the Springform Pan

Grease the sides and bottom of the springform pan with butter or non-stick spray.
Line the bottom with parchment paper for easy removal later.
This preparation step helps to ensure the cake releases easily after baking.
Proper greasing reduces the risk of sticking.
Step 8: Pour Batter and Add Topping

Pour the batter into the prepared springform pan, spreading it evenly.
Sprinkle the oat topping generously over the batter.
This topping will add a crunchy texture and sweetness.
Ensure the topping is evenly distributed for consistent baking.
Step 9: Bake the Cake

Place the pan in the preheated oven and bake for 45-50 minutes.
Check for doneness by inserting a toothpick in the center; it should come out clean.
The cake will be golden brown on top when done.
Avoid opening the oven door frequently to prevent temperature fluctuations.
Step 10: Cool and Serve

Once baked, remove the cake from the oven and let it cool in the pan for about 10 minutes.
Carefully release the springform and transfer the cake to a wire rack to cool completely.
Slice into pieces once cooled and serve warm or at room temperature.
This cooling process helps set the flavors.
Critical Timing and Temperature Guide
Baking Time: Bake the cake for 45-50 minutes at 350°F (175°C). The cake should be golden brown, and a toothpick inserted in the center should come out clean. Common mistakes include underbaking, which results in a wet center, or overbaking, leading to dryness.
Cooling Time: Allow the cake to cool in the pan for 10 minutes before transferring it to a wire rack. If you skip this step, the cake may break apart when removed. A properly cooled cake will slice neatly.
Serving Temperature: The cake can be served warm or at room temperature. Serving it warm enhances the flavors, while room temperature provides a firmer texture. Avoid serving it too hot to prevent burns.
Pro Tips for Apple Pie Coffee Cake Recipes Sweet Spiced Dessert Idea
• Ingredient Selection: Use freshly grated nutmeg and high-quality apples like Granny Smith or Honeycrisp for the best flavor.
• Preparation Secret: Let your butter sit at room temperature for at least an hour to ensure it creams smoothly with the sugar.
• Temperature Management: Ensure all ingredients are at room temperature before mixing, as this helps with emulsification and texture.
• Texture Enhancement: For a moist cake, do not overmix the batter after adding the dry ingredients.
• Flavor Layering: Incorporate a splash of vanilla extract into the batter for an extra depth of flavor.
• Make-Ahead Strategies: The cake can be made a day in advance and stored tightly wrapped to maintain freshness.
• Restaurant-Quality Finishing Touches: Drizzle a simple glaze made with powdered sugar and milk over the cooled cake for added sweetness.
• Equipment Optimization: Use a digital kitchen scale for accurate measurements, especially for flour and sugar.
Troubleshooting Common Issues
• Texture Too Dense: This can happen if the batter is overmixed or if too much flour is added. To prevent it, measure your flour accurately and mix just until combined.
• Flavors Unbalanced: If the cake tastes bland, it may need more spices or salt. Taste the batter before baking and adjust as needed, keeping in mind that flavors will deepen as it bakes.
• Cake Sinking in the Middle: This can occur due to underbaking or too much leavening agent. Make sure your oven is properly calibrated and avoid opening the door frequently during baking.
• Apples Sink to the Bottom: If apples settle, toss them in a bit of flour before folding them into the batter. This helps suspend them in the cake.
• Crumbly Topping: If your topping is too dry, add a touch more melted butter to help it bind together better.
• Burnt Edges: If the edges are browning too quickly, cover the cake loosely with aluminum foil during the last 15 minutes of baking.
Variations and Regional Differences
• New England Variation: Often includes a crumbly streusel topping made with additional spices and nuts, providing extra texture and a spiced flavor profile.
• Midwestern Version: Some recipes incorporate a layer of cream cheese in the batter, adding richness and tanginess to the cake.
• Southern Style: This variation may feature pecans as a topping, giving a distinctly Southern flair with a crunch and nutty flavor.
• Modern Interpretations: Current adaptations may use gluten-free flour or plant-based milk to cater to dietary trends while maintaining the essence of the original recipe.
Food Science Behind the Recipe
• Maillard Reaction: This chemical reaction occurs between sugars and proteins when baking, creating the golden-brown color and rich flavors on the cake’s surface.
• Emulsification: The process of mixing butter and sugar creates an emulsion that traps air, contributing to a lighter cake texture. This is essential for achieving the desired fluffiness.
• Starch Gelatinization: As the cake bakes, the starches in the flour absorb moisture and swell, contributing to the cake’s structure and moisture retention.
Frequently Asked Questions
What’s the most common mistake people make when preparing Apple Pie Coffee Cake? The most frequent mistake is overmixing the batter, which can result in a dense texture. To prevent this, mix just until combined and no dry flour remains.
Can I prepare components of this dish in advance? Yes, you can prepare the batter and apple filling a day ahead. Store them separately in the refrigerator to maintain freshness before baking.
How do I adapt this recipe for dietary restrictions? For gluten-free options, substitute all-purpose flour with a gluten-free blend. For a dairy-free version, use almond milk and coconut oil instead of butter.
What’s the best way to store and reheat leftovers? Store leftovers in an airtight container at room temperature for up to 3 days. Reheat slices in the microwave for 20-30 seconds before serving to restore warmth and moisture.
Can I freeze this dish? Yes, you can freeze the cake for up to 3 months. Wrap it tightly in plastic wrap and then foil to prevent freezer burn. Thaw in the refrigerator overnight before serving.
What wine or beverages pair best with this dish? A crisp white wine like Sauvignon Blanc or a hot spiced cider complements the flavors of the cake beautifully.
How can I scale this recipe up for a crowd? To serve a larger group, simply double the ingredients and use a larger pan, adjusting the baking time as needed to ensure even cooking.
What side dishes complement this recipe best? Fresh whipped cream or vanilla ice cream pairs wonderfully with the cake, enhancing the flavors and adding creaminess.
How do professional chefs elevate this dish for restaurant service? Chefs often serve this cake with a scoop of homemade ice cream or a drizzle of caramel sauce, adding a touch of elegance and indulgence.
Serving and Presentation Guide
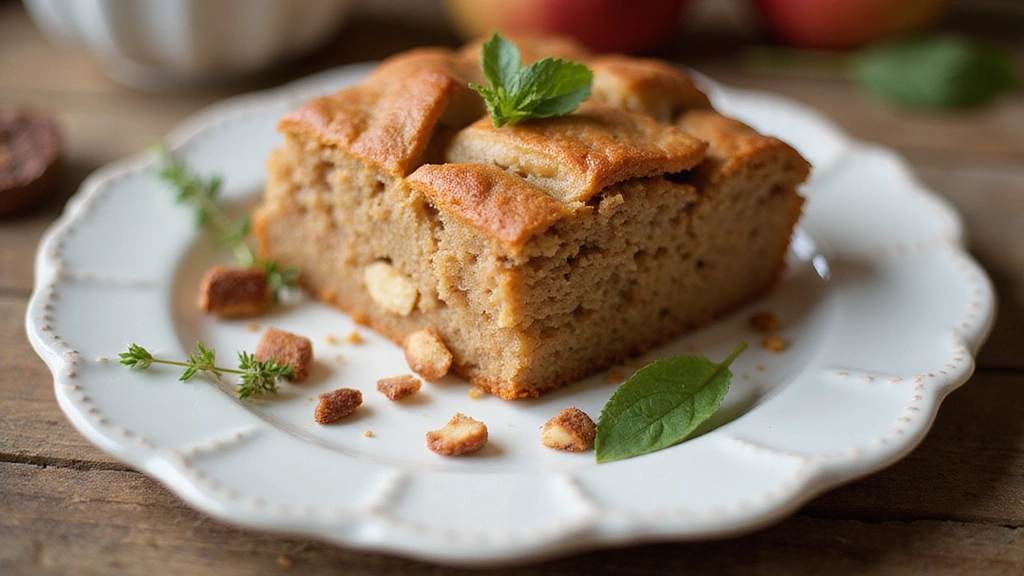
• Traditional Presentation: Serve the cake directly from the springform pan, garnished with a dusting of powdered sugar or a dollop of whipped cream on top.
• Modern Plating Ideas: Present individual slices on elegant plates with a side of caramel sauce and a sprig of mint for a contemporary look.
• Accompaniment Suggestions: Pair with a scoop of vanilla ice cream or a dollop of crème fraîche to enhance the dessert experience.
• Special Occasion Presentation: For celebrations, consider layering the cake with a rich cream cheese frosting and adding edible flowers for a stunning visual appeal.
Conclusion
This Apple Pie Coffee Cake is a delightful fusion of flavors that is sure to warm hearts and homes.
Perfect for any occasion, it invites everyone to gather around the table and enjoy.
I hope you give this recipe a try and savor its comforting taste for yourself.