
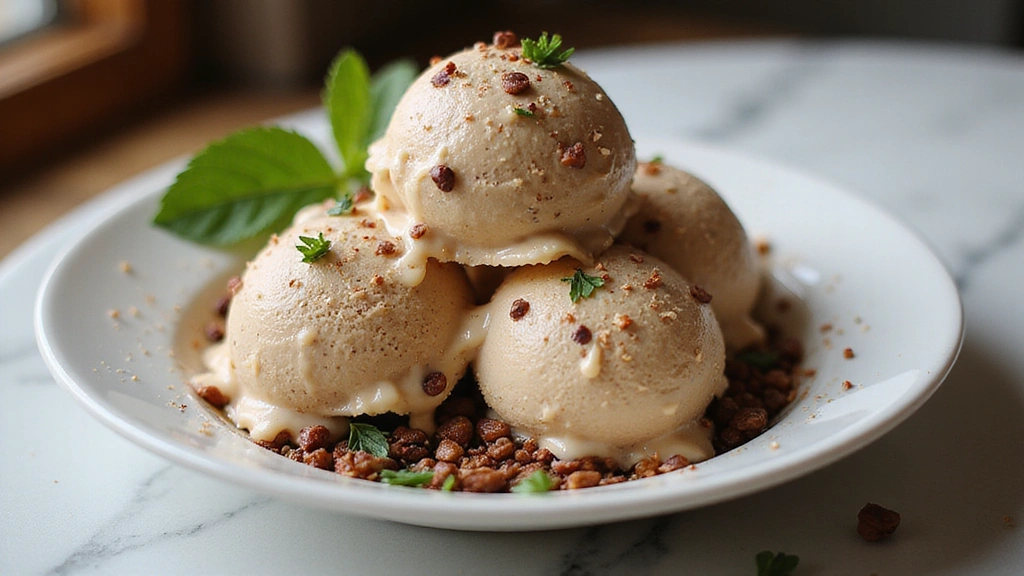
Keto Coffee Ice Cream is a delightful treat that perfectly marries the rich flavors of coffee with the creamy texture of ice cream.
This low-carb dessert is not only a satisfying way to indulge your sweet tooth but also a perfect pick-me-up for coffee lovers.
I stumbled upon this recipe while searching for healthier alternatives to traditional ice cream, and it quickly became a family favorite.
Whether you’re following a ketogenic diet or simply looking to enjoy a guilt-free dessert, this Keto Coffee Ice Cream delivers both flavor and satisfaction.
The History and Cultural Significance
• Keto Coffee Ice Cream Recipes trace their origins to the modern ketogenic diet movement, which gained popularity in the early 2000s as a low-carb, high-fat approach to eating.
• As the demand for low-carb desserts grew, inventive chefs began to create ice cream alternatives that catered to this dietary preference, leading to the delicious versions we have today.
• In contemporary culture, ice cream is a staple dessert for celebrations and gatherings, symbolizing joy and indulgence without the guilt for those on a keto diet.
• While traditional ice cream is often laden with sugar and carbs, keto versions maintain a creamy texture and rich flavor profile using low-carb sweeteners and heavy cream.
Recipe Overview
Nutritional Information (per serving)
Ingredients
Essential Equipment Guide
Ice Cream Maker: An ice cream maker is crucial for achieving the creamy texture that makes ice cream enjoyable. Look for a model that has a built-in compressor for the best results, as it allows for continuous churning without the need to freeze the bowl in advance.
Blender or Food Processor: A powerful blender or food processor is essential for smoothly incorporating all the ingredients. This equipment helps to blend the coffee and cream together effectively, ensuring a uniform consistency.
Mixing Bowls: Use large mixing bowls for combining ingredients. They should be made from glass or stainless steel to withstand temperature changes when mixing hot liquids.
Preparation Methods
Brewing Coffee: To achieve the best flavor, brew your coffee using a method that brings out its richness, such as a French press or espresso machine. Make sure to let it cool before adding to the mixture, as hot coffee can alter the texture of the cream.
Chilling the Mixture: It’s essential to chill the mixture before churning it in the ice cream maker. This helps to create a smoother texture and prevents the formation of ice crystals during the churning process.
Churning: Churning the ice cream in an ice cream maker incorporates air, giving it a light and airy texture. Be mindful of the manufacturer’s instructions regarding churning time, as over-churning can lead to a grainy consistency.
Step 1: Brew the Coffee

Start by brewing a strong cup of coffee using your preferred method.
Ensure that the coffee is robust to provide a deep flavor in the ice cream.
Once brewed, allow it to cool to room temperature before using.
This step is crucial as hot coffee can negatively impact the cream’s texture.
Step 2: Combine Ingredients

In a large mixing bowl, combine the heavy cream, almond milk, brewed coffee, erythritol, vanilla extract, and salt.
Whisk together until all ingredients are thoroughly combined and the erythritol is dissolved.
Make sure not to over-whisk to avoid incorporating too much air at this stage.
The mixture should be smooth and creamy, ready for chilling.
Step 3: Chill the Mixture

Cover the mixing bowl with plastic wrap or a lid and place it in the refrigerator.
Chill the mixture for at least one hour, or until it is thoroughly cold.
This chilling process helps improve the final texture of the ice cream.
Don’t skip this step, as it prevents ice crystals from forming during churning.
Step 4: Churn the Ice Cream

Pour the chilled mixture into the ice cream maker and start the churning process as per the manufacturer’s instructions.
Churn until the mixture thickens and resembles soft-serve ice cream, usually about 20-30 minutes.
Keep an eye on the texture to ensure it doesn’t become too hard.
This step incorporates air and creates the desired creamy consistency.
Step 5: Transfer to Freezer Container

Once churned, transfer the ice cream into a freezer-safe container.
Use a spatula to smooth the top and ensure there are no air pockets.
Seal the container tightly with a lid to prevent freezer burn.
This step is important for maintaining the ice cream’s texture as it freezes completely.
Step 6: Freeze Until Firm

Place the container in the freezer and freeze for at least 4 hours, or until firm.
Check the consistency to ensure it reaches the desired scoopable texture.
If left too long, you may need to let it sit at room temperature for a few minutes before scooping.
Proper freezing is key to achieving the right firmness without becoming icy.
Step 7: Serve and Enjoy

When ready to serve, scoop the ice cream into bowls or cones.
Consider garnishing with a sprinkle of cocoa powder or a few coffee beans for added flair.
Enjoy your keto coffee ice cream as a refreshing treat any time of the day.
Sharing this dessert is a perfect way to impress friends and family with your low-carb lifestyle.
Critical Timing and Temperature Guide
Chilling the Mixture: Chill for at least 1 hour. The mixture should be very cold, around 40°F (4°C) before churning. Common mistake: Skipping this step can lead to icy ice cream instead of creamy.
Churning: Typically takes 20-30 minutes in an ice cream maker. Look for a soft-serve consistency before transferring to the freezer. Over-churning can result in a grainy texture.
Freezing: Freeze for at least 4 hours. The ice cream should be firm but scoopable at around 0°F (-18°C). Forgetting to seal the container can lead to freezer burn.
Pro Tips for Keto Coffee Ice Cream Recipes Low Carb And Creamy
• Ingredient Selection: Opt for high-quality coffee and fresh heavy cream for the best flavor and texture.
• Preparation Secret: Adding a pinch of xanthan gum can help improve the texture and prevent ice crystals.
• Temperature Management: Ensure all ingredients are cold before mixing, which aids in achieving creamy results.
• Texture Enhancement: Regularly stir the ice cream every hour during the first few hours of freezing for a smoother texture.
• Flavor Layering: Incorporate a dash of cinnamon or nutmeg for an extra flavor dimension.
• Make-Ahead Strategies: Prepare the mixture a day in advance for optimal chilling before churning.
• Restaurant-Quality Finishing Touches: Serve with a drizzle of sugar-free chocolate sauce for that gourmet touch.
• Equipment Optimization: Pre-chill your ice cream maker bowl if it’s not self-freezing for the best results.
Troubleshooting Common Issues
• Ingredient Selection: Opt for high-quality coffee and fresh heavy cream for the best flavor and texture.
• Preparation Secret: Adding a pinch of xanthan gum can help improve the texture and prevent ice crystals.
• Temperature Management: Ensure all ingredients are cold before mixing, which aids in achieving creamy results.
• Texture Enhancement: Regularly stir the ice cream every hour during the first few hours of freezing for a smoother texture.
• Flavor Layering: Incorporate a dash of cinnamon or nutmeg for an extra flavor dimension.
• Make-Ahead Strategies: Prepare the mixture a day in advance for optimal chilling before churning.
• Restaurant-Quality Finishing Touches: Serve with a drizzle of sugar-free chocolate sauce for that gourmet touch.
• Equipment Optimization: Pre-chill your ice cream maker bowl if it’s not self-freezing for the best results.
Variations and Regional Differences
• Italian Affogato: This variation features a scoop of vanilla gelato topped with a shot of hot espresso. It offers a delightful contrast between hot and cold, highlighting coffee’s bold flavors.
• Mocha Variant: By adding cocoa powder or chocolate syrup, you can create a mocha ice cream that combines coffee and chocolate for a rich dessert experience.
• Nutty Coffee Ice Cream: Incorporate crushed nuts like hazelnuts or almonds to add a crunchy texture to the creamy ice cream.
• Modern Interpretations: Some contemporary recipes incorporate alternative milks like coconut or cashew to enhance the flavor and cater to various dietary needs.
Food Science Behind the Recipe
• Emulsification: Combining fats from cream and liquids creates a stable mixture that prevents separation, resulting in a creamy texture.
• Freezing Point Depression: The presence of sugar substitutes lowers the freezing point, which helps the ice cream remain scoopable and prevents it from becoming too hard.
• Air Incorporation: Churning introduces air into the mixture, creating a light texture that is characteristic of quality ice cream.
Frequently Asked Questions
What’s the most common mistake people make when preparing Keto Coffee Ice Cream? Many people forget to chill the mixture properly, leading to icy texture instead of creaminess.
Can I prepare components of this dish in advance? Yes, you can prepare the mixture a day ahead and store it in the fridge to enhance flavors.
How do I adapt this recipe for dietary restrictions? To make it dairy-free, substitute the heavy cream with coconut cream and use almond milk.
What’s the best way to store and reheat leftovers? Store in an airtight container in the freezer for up to 2 weeks. Let it thaw for a few minutes at room temperature before serving.
Can I freeze this dish? Yes, it freezes well, but ensure it’s stored in an airtight container to prevent freezer burn.
What wine or beverages pair best with this dish? A rich dessert wine or a robust coffee liqueur would make great pairings with the flavors of the ice cream.
How can I scale this recipe up for a crowd? Simply multiply the ingredients by the number of servings desired, but ensure your ice cream maker can handle the increased volume.
What side dishes complement this recipe best? Fresh berries or a slice of low-carb cake are excellent companions to enhance this dessert’s flavors.
How do professional chefs elevate this dish for restaurant service? They often use gourmet toppings like candied nuts or a drizzle of flavored syrups for added sophistication.
Serving and Presentation Guide
• Traditional Presentation: Serve in elegant glass bowls with a sprinkle of cocoa powder and a few coffee beans on top, highlighting the coffee flavor.
• Modern Plating Ideas: Use a slate board to serve scoops of ice cream, drizzled with sugar-free chocolate sauce and accompanied by fresh berries for a pop of color.
• Accompaniment Suggestions: Pair with a shot of espresso or a low-carb dessert to create a delightful dessert experience.
• Special Occasion Presentation: For celebrations, serve in individual dessert cups with whipped cream and chocolate shavings on top.
Conclusion
Keto Coffee Ice Cream is a deliciously satisfying dessert that allows you to enjoy a treat without straying from your low-carb lifestyle.
Its rich flavor and creamy texture are sure to impress friends and family alike.
I encourage you to try this recipe and experience the joy of a guilt-free indulgence.